I’ve recently got a Galileo enclosure produced by duinoCases and want to share my experience using it so far for those looking for additional info.
Full disclosure: I’ve got the case as a free sample from duinoCases, so you may treat my view as biased if you wish, even though I believe it’s not :)
Summary: the case is quite solid and would make a good home for your board. Not without small drawbacks (more on that later), but overall my impression is largely positive.
It’s indeed made of steel, about 1mm thick. IMHO that’s a bit of an overkill, but you may stop worrying about accidentally hitting your board in the enclosure with a hammer – it’s sturdy enough to survive that :) That also adds weight to the overall construction, which is a welcome side effect – before that I used just plastic standoffs and had the board dragged away by cables way too often.
There are a lot of holes in the upper part for the ventilation and all the cutouts fit perfectly to the board’s various interfaces. You also get a full set of screws + 4 rubber feet in the set + 2 plastic plugs for antenna jack holes. This picture outlines the set and is exactly what I’ve got. All the surfaces and screws fit nicely, I didn’t have any problems putting the enclosure together. The cutouts on the bottom side allow you to attach the board to the wall – either in a horizontal or vertical position.
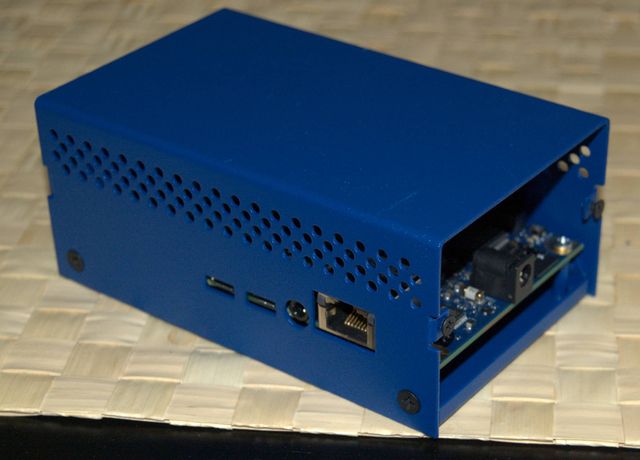
The only drawback I’ve found so far is that SD card slot and board’s Reset and Reboot buttons are not reachable when the enclosure is fully assembled + status LEDs are not that visible too. That’s generally fine if you have the board fully setup and just running a final program, but may be inconvenient when you’re just developing and need to e.g. swap cards (which is what I’m doing most of the time). I’m simply using the case without the piece covering the power jack side (see photo below), but I’m thinking about spending some time with a drill and making those accessible too – shouldn’t be too hard. Talk about hardware hacks :)
That’s pretty much it, if you want to get any specific details – just let me know in comments.